Outline of the post:
- What is Image Data Augmentation?
- Image data of clouds and sun (hand drawn)
- Code to augment an image in Python
What is Image Data Augmentation?
Image data augmentation is a technique to create copies of altered original images. Thus increase the amount of data to train a model. This additional data may improve model fit resulting in better accuracy.
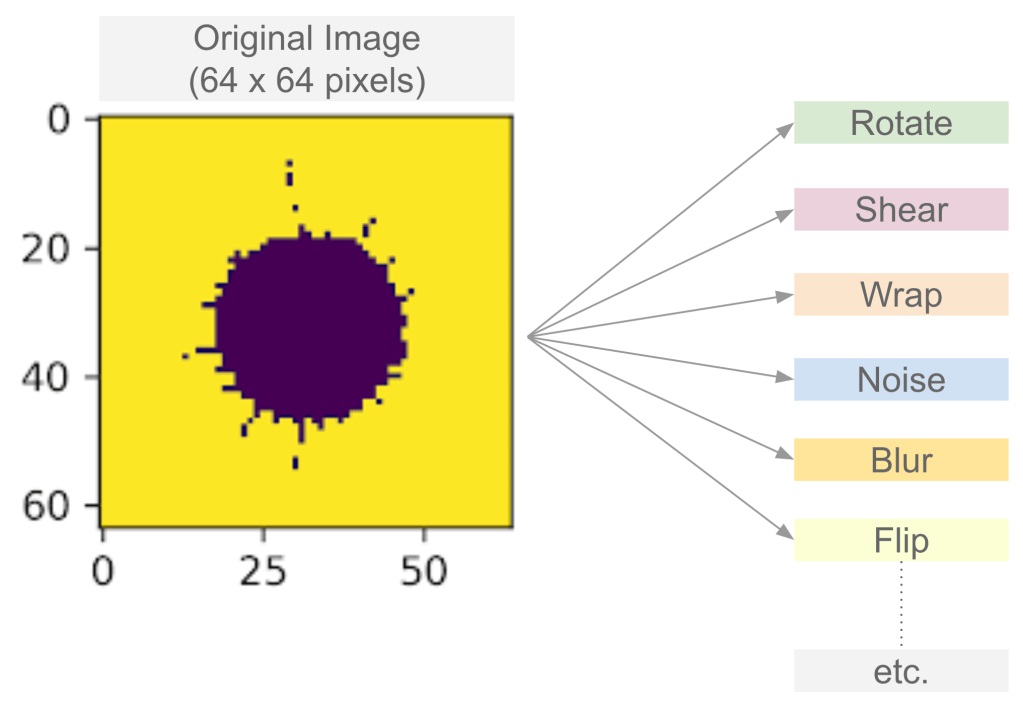
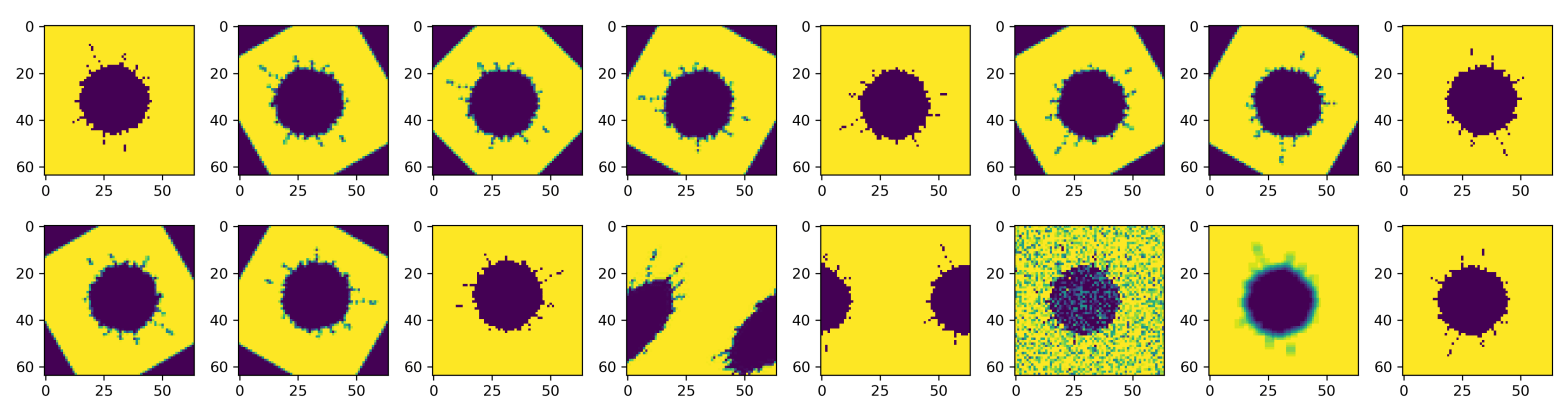
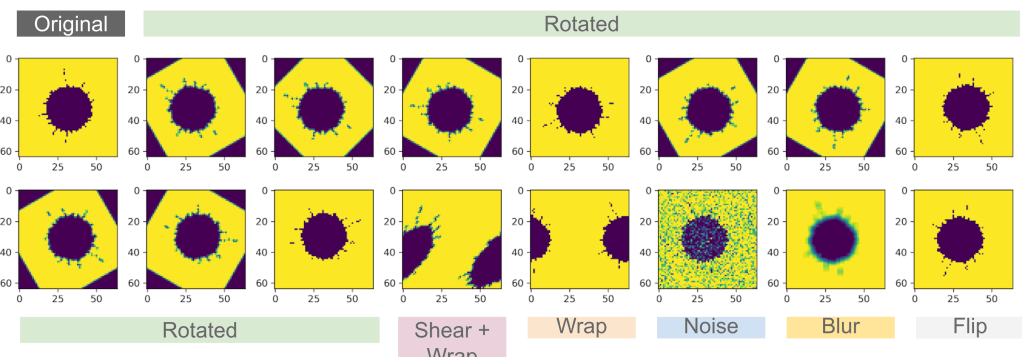
Figure 1 shows a few transformations that can be applied to an image. In this post, we will look at how to rotate, shear, wrap, add noise, add blur and flip an image. Thus one image will generate 15 additional images for the same class.
Image Data
Download link: https://github.com/learndataa/datasets/blob/master/clouds_and_sun.zip
Size: 64 x 64 pixels
Number of cloud images: 100
Number of sun images: 100
Format: PNG

Code – 1:
Augment a single image using a custom function .augment_image().
Import libraries
import numpy as np
import matplotlib.pyplot as plt
import skimage.io as io

from skimage import transform
from skimage.transform import rotate, AffineTransform,warp
from skimage.util import random_noise
from skimage.filters import gaussian
from scipy import ndimage

import os
Create function to augment image
### Function for image augmentation
def augment_image(file):

    img = io.imread(file, as_gray=True)

    # Class label
    # 1 == cloud i.e. rain
    # 0 == sun i.e. no rain

    if(os.path.basename(file).split("_")[0] == 'cloud'):
        yi =[1]
    else:
        yi = [0]

    # Rotate
    i1 = rotate(img, angle=30).reshape(1,-1)
    i2 = rotate(img, angle=45).reshape(1,-1)
    i3 = rotate(img, angle=60).reshape(1,-1)
    i4 = rotate(img, angle=90).reshape(1,-1)
    i5 = rotate(img, angle=120).reshape(1,-1)
    i6 = rotate(img, angle=150).reshape(1,-1)
    i7 = rotate(img, angle=180).reshape(1,-1)
    i8 = rotate(img, angle=210).reshape(1,-1)
    i9 = rotate(img, angle=240).reshape(1,-1)
    i10 = rotate(img, angle=270).reshape(1,-1)

    # Shear
    af_trans = AffineTransform(shear=-0.75)
    i11 = transform.warp(img, af_trans, order=3, preserve_range=True, mode='wrap')
    i11 = i11.reshape(1,-1)

    # Wrap
    transf = AffineTransform(translation = (-img.shape[0]/2, 0))
    i12 = warp(img, transf, mode='wrap')
    i12 = i12.reshape(1,-1)

    # Noise
    i13 = random_noise(img, var=.1)
    i13 = i13.reshape(1,-1)

    # Blur
    i14 = ndimage.uniform_filter(img, size=(4,4))
    i14 = i14.reshape(1,-1)

    # Flip
    i15 = np.flipud(img)
    i15 = i15.reshape(1,-1)

    # Augmented image list
    xi = [i1, i2, i3, i4, i5, i6, i7, i8, i9, i10, i11, i12, i13, i14, i15]

    # Output
    yi = yi*len(xi)

    return xi, yi
Plot augmented images
### Set path to one image in the dataset
path = '<... add path here ...> /sun_2.png'
xx, yy = augment_image(path)

### Plot augmented images
fig = plt.figure(figsize=(15,4))
r, c = 2, 8
imgx = io.imread(path, as_gray=True)
plt.subplot(r,c, 1)
plt.imshow(imgx)

for i in range(len(xx)):
    plt.subplot(r, c, i+2)
    plt.imshow(xx[i].reshape(64,64))

plt.tight_layout()
plt.show()
Code – 2:
Augment multiple images in a folder using .augment_image() function created above.
Import libraries
import numpy as np
import matplotlib.pyplot as plt

from sklearn import linear_model
from sklearn import datasets
from sklearn.model_selection import train_test_split

import skimage.io as io
from sklearn.utils import shuffle

from sklearn.pipeline import make_pipeline
from sklearn.preprocessing import StandardScaler
from sklearn import metrics

from mlxtend.plotting import plot_confusion_matrix

# augment
from skimage import transform
from skimage.transform import rotate, AffineTransform,warp
from skimage.util import random_noise
from skimage.filters import gaussian
from scipy import ndimage

import os
import glob
Augment all images in the folder
# Path
path = '<... enter path here ...>/clouds_and_sun/*.png'

xa, ya = [], []

for file in glob.glob(path):
    tx, ty = augment_image(file)

    xa.append(tx)
    ya.append(ty)

xa = [ j for i in xa for j in i]
ya = [ j for i in ya for j in i]

print(len(xa))
print(len(ya))

newx = np.concatenate([x, np.concatenate(xa, axis=0)], axis=0)
newy = y + ya

print("newx: ", newx.shape)
print("newy: " , len(newy))
3000
3000
newx = np.concatenate([x, np.concatenate(xa, axis=0)], axis=0)
newy = y + ya

print("newx: ", newx.shape)
print("newy: " , len(newy))
newx:  (3200, 4096)
newy:  3200
.
Check out the related YouTube videos!
